Showing posts with label Fitting. Show all posts

Wednesday, May 7, 2014

My First Full Bust Adjustment on Princess Seams: Part 2-Moving the Apex Over

In the previous post, I covered moving the apex down. In this post, I will cover moving it over.  

I have measured myself quite extensively, and I know that my apexes are about 11 inches apart.  Now, on a princess seam garment, the princess line can hit one of two places: directly on the apex or just outside the apexes.  So as far as the distance between the apexes, we will use the edge of the princess line to guide us, ignoring the apex marked on the pattern. (I mean, logically different sizes would require the apexes be at different widths.)

So, with an apex distance of 11 inches, I would need at least 6.5 inches for the center piece to be wide enough at the bust.  So I will add about an inch or so.  

I measured out an inch and did my best to get that line in there without adding a huge arm hole.  I don't mind extra at the waist.  I will probably need it, but extra in the arm hole would be a nightmare.  The extra in the waist can easily be fitted out later.
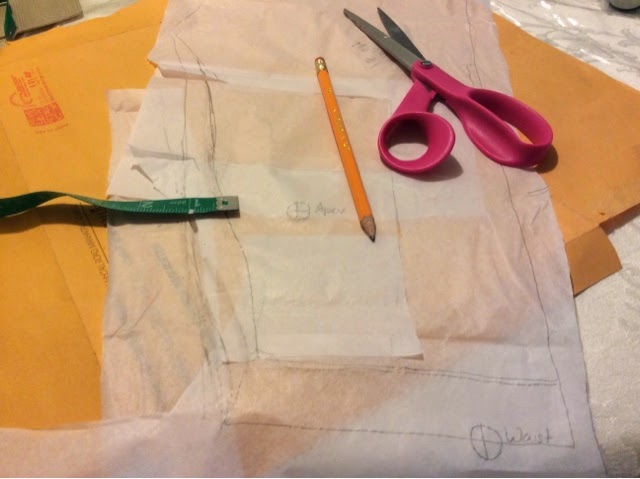
Consider the princess seam and the apex moved!!

From here, I just followed some FBA tutorial.  I also added width at the waist.  To be sure, I remeasured all of my pattern pieces again. In the next post, I will reveal the tissue fit result.

My First Full Bust Adjustment on Princess Seams: Part 1-Moving the Apex Down

I am in a wonderful Facebook group, called Sewing Inspiration and Tutorials.  I got the advice on how to do this from there and this tutorial. 

Really this is my second attempt, but it is my first successful one!

First I traced my pattern and eliminated removed all of the seam allowances.

The first part of this adjustment involves moving the apex down.  You have to make sure that the fullness is in the right place or you will have some weirdness going on.  

So first I measured from my shoulder to my apex and compared the measurement to the pattern. My measurement was 15 inches as compared to the 12 inches on the pattern.  This means that I need to lower the apex of the dress about 3 inches.


To lower the apex, I drew a box around the apex using the notches as reference points.  

Next, I cut the boxes out and moved them down 3 inches and taped the pieces in place. (Now, I would suggest putting tissue paper beneath before you do this.  It just makes things easier, but I put an envelope beneath so you could see.)

I taped the pieces to the tissue paper and trued the lines the best I could.

Next, I needed to mark the level of the apex on the side panel.  Since it was an 1.5 inches below the notch on the center, I measured the same distance on the side. (60-58.5=1.5)

The apex is at the right height!